Sunday, 16 December 2007

Product Photo: Spirit Level Rule

Sorry I haven't had time to be putting up any videos the last while. I figured I'd put this one up quickly though without a video. Pretty simple setup, so the shots at the end should let you see how to go about it.

Well, first thought for this shot was background colour. I figured something vivid was called for, so I opted for the brightest of the bunch - a nice bright yellow sheet.

Next thought was how I was going to light this. I wanted to get some light deep in that bubble to make it glow well. I opted for a ringlight which I knew would give a good "shadowless" light while showing up the colour of the bubble. I fired off a test shot to see how well it worked.


Pretty spot on for the bubble, brightness wise, but virtually no light comes back from the ruler because it's sitting at an angle. To deal with this, I needed to put some fill from the right hand side. I put in a couple of my small white foamboard reflectors and fired off another test shot.


At least you can see the effect even if it's subtle. The boards were angled to catch light from the ringlight. So I could either boost the ringlight power to get more light on the ruler, but thereby make the bubble overly bright, or I have to add another light source.

I grabbed another speedlight and put on a small softbox and honeycomb on the front. This had a couple of benefits. Firstly, the soft source of light would more evenly light the two reflectors. Secondly, placing it to the left and firing it over the top of the ruler meant I got a little spill on to the background which gives a nicer brighter image. Lastly, the honeycomb meant I'd not get flare from the light source being just off to the side of the shot. So here's the result. You'll note I've reframed the shot to try and give a better composition. The previous shots were purely tests.


Here's a couple of setup shots.


Monday, 5 November 2007

Portable Soft Lighting Studio

Just a heads up to let everyone know the Maplin Portable Soft Lighting Studio is on special deal again at £9.99 - half the normal price - so get in there quick if you want one!

Saturday, 13 October 2007

Product Photo: Model Guitar

I took this photo of a model guitar today. Didn't have time to set up the camcorder for this one, but I did take a setup shot. I'll just talk you through it.


You should easily spot at least two of the flashes used, and extra points if you spotted the third source. The major component of lighting this shot is having precise control over light spill. Fire light all over the place and your shot is ruined. In fact, the light was so tightly controlled, that when I went to take a setup shot, it was almost black apart from the guitar and background. I had to notch the ISO speed on the camera right up.

So the first light is the main light on the the guitar. It is a long-snooted flash which is pointing at the lower part of the guitar, and also providing some light on the silver floor. You should have spotted that from the harsh shadows on and around the guitar.

The second light is a honeycomb snoot with a blue gel fired at the background. It was pulled back away from the background until it provided a large enough spot of light behind the guitar. The reason for this light is to prevent the guitar disappearing into the background.

The third light is a small softbox off to camera left with a wide angle honeycomb attachment. Yet another one of my diy light modifiers. It provides a relatively soft light which is fairly directional, so spill can be minimised on the background. This light was feathered up a bit so as to provide more light on the top of the guitar, while only adding slight highlights down below.


This is a closeup crop on the small softbox with honeycomb, because I suspect it's the one you'll have least likely seen anything about elsewhere. You get very large ones for studio strobes which are commonly used in portraiture and such like. Apologies for the high ISO noise, but as I said, the light was so controlled I had to notch up the ISO for the setup shots.

Tuesday, 9 October 2007

Inverse Square Law

The inverse square law seems to cause a fair bit of confusion among photographers. It is pretty natural to think that if you put your flash twice as far away from your subject, you'd simply need to double the power. The idea that you need to quadruple it seems rather alien.

Try to think of it this way. If you're standing to the side of the flash, watching the light go outwards, what is happening? Well, the beam is spreading from the size of the flash outwards to cover a larger size on the wall you fire it at, right? But it is actually spreading in two directions - the horizontal direction and the vertical direction.

So when you double the distance, you're doubling the spread in both directions. So two times the distance in two directions is 4 times the area covered on the wall. So, thinking in this way, it should be quite obvious why the flash needs to be 4 times the power for twice the distance.

Click on the image below to view an animation which might help a little in visualising a 3D beam of light.


The physics bit you don't have to read

For the geeks around, you'll realise that no flash applies to the Inverse Square Law. Why? Well the Inverse Square Law only applies to a light source which shines light in all directions at equal intensity. Strobes and flashguns fire out in whatever direction they are pointed, and use reflectors to modify the way the light travels.

So is the Inverse Square Law no use? Well, if your flash gun had a huge snoot, or is focussed in some other way to the point it behaved almost like a laser, then you'd find that the Inverse Square Law would fail. However, for most situations, where light comes out the flash and gives a reasonable size beam on a wall, you'll find that the flash acts just like a little beam within a more powerful point source of light, and therefore the Inverse Square Law gives a pretty good approximation of how the light fall off will behave.

Guide Numbers vs. Watt Seconds

A post in the photosig forum was asking about a link between Guide Numbers and Watt Seconds, and whether there was a direct conversion.

It is possible to do calculations to do this conversion, but for most real-world situations, it's unbelievably complex, with light having to be simulated or otherwise modelled as it travels via reflectors etc. before heading in its final direction.

Guide numbers don't really give information about the power of a flash though. What they give is information about how bright they make a subject at a given distance, and therefore, how wide an aperture you should have to correctly expose that subject.

It is therefore possible to do a conversion directly to an Illuminance value in Lux.

Once you have this value, you then would need to model the light to give a value in Lumens or Lumenseconds. The only one you can really calculate is an imaginary light source which evenly lights in all directions (a point light source, a bit like a star). This never applies to any strobe though, so it's purely for interest sake.

If you're allergic to maths, look away now!

First of all, go have a read of this rather interesting page on Photometry of Strobes, and in particular the section called "Photographic Light Meters, Exposure Value and Guide Number" although almost everything before this section is of use in explaining the following calculations. This page is my source for the equations to calculate all of this, so I'm making the assumption this information is correct.

Here's the initial conversion from Guide Number to Lux, with a few assumed values added in to do the sample calculation.


And the following conversion to watt seconds for an ideal point source light is purely for interest sake.


Apologies for the poor hand-writing and hopefully I don't need to make any apologies for any mistakes in the maths! If you find any though, I'd like to know about them asap!

Friday, 5 October 2007

Watt Seconds vs. Effective Watt Seconds

What is a Watt Second?

Well, it's a unit of electrical energy, also known as a Joule. It is a Power of 1 Watt for a time of 1 second.

So what is a Watt? Well it is calculated as current (measured in amperes) multiplied by voltage (measured in volts).

So 1 Watt = 1 Ampere x 1 Volt = 0.5A x 2V = 2A x 0.5V etc. etc.

So, supposing you have a 1000W strobe, it has the capability to put 1000W of electrical power into firing the flash. This has no real bearing on how bright the flash is, although everything else being equal, a 500W strobe would, in theory, be half as powerful as a 1000W strobe.

Why Watt Seconds then?

A flash fires for only a fraction of a second. Depending on the make and model, this can be anything from 1/750s to 1/2000s or shorter. Generally, the harder a flash fires, the longer the flash time is. In order to compare the wattage with that of a standard continuous light source, such as a tungsten bulb, you really need to take into account how much power is used in a given time. So, taking a 500W tungsten lamp, you can propose that running it for 1 second will take 500 Watt Seconds, which I will say as 500Ws from now on. A 500Ws flash will use a far greater power, but does so for a much shorter time. Say the 500Ws flash fires for just 1/1000s, the actual power which would be used by the flash if it lit for the whole second would be 1000 times the 500Ws value, which would be 500,000W. That would take a seriously bright light to sustain that output!

So the answer is that Watt Seconds allow the electrical power used by a continuous lamp to be compared with that of a strobe.

How is light output measured?

If you buy a scientific light meter, you'll find that when you shine a light on it, it gives a value in Lux. This is the standard accepted unit for measuring the intensity of light which falls on a surface.

The output of a light source is measured in Lumens, which is defined by the following:

1 Lumen = 1 Lux x 1 Square metre

For the same reasons of comparing with continuous lights, it is necessary to make up a value known as Lumenseconds.

How are Watt Seconds and Lumenseconds linked?

The job of a strobe is to convert electrical energy into light energy, and like any light bulb, there is an associated efficiency. Some strobes are more efficient than others, with poor models producing around 15 lumenseconds for every watt second, while more efficient models can product up to 50 lumenseconds for every watt second.

So where does the term Effective Watt Seconds come from?

According to white-lightning.com, which gives the best explanation I have found, a company called Inverse Square Systems first coined this term in relation to a product known as "Stroblox" which it released in 1985.

They had produced a strobe which was more efficient than many others on the market. Most people compared one strobe to another in terms of Watt Seconds, because the efficiency of each strobe wasn't that different at that time. So in order to market this new product, they had to show that it had a lot higher light output due to higher efficiency than the equivalent watt second strobe from a competitor.

They therefore measured the average light output for competitors strobes, compared it with their own, and came up with the statement that their strobe was effectively as powerful as a competitors strobe with a much higher watt second rating.

It was a nice bit of marketing, but unfortunately the term has stuck, and despite being pretty much meaningless, successive companies happily quote an "effective watt seconds" rating, higher than the actual watt second rating of the unit, in order to make the product seem more powerful.

Quick conclusion

So how can you compare strobes? The only reliable way is to find data for the Lumenseconds output of the units, and compare all the units that way. If you have quoted Watt Seconds, you then need to know the efficiency in terms of the number of Lumens per Watt Second the unit produces. You can then calculate the Lumenseconds value to compare the units.

As for Effective Watt Seconds? It's very useful for selling underpowered strobes.

Thursday, 4 October 2007

Guide to Guide Numbers

Guide numbers are the common method of comparing the relative powers of different flashes. The value is found experimentally by firing the flash at maximum power at a subject which is a fixed distance from the flash. With no other source of light, a flash meter is used to obtain an optimum aperture for a "correct exposure", which is of course slightly subjective. Similarly a camera could be used, and photographs compared for the best exposure, although there would be significant complication introduced by having to take additional account of reflectance of the subject being photographed and the distance from the camera to the subject.

One area of common confusion is that Guide numbers can be specified as either feet or metres. Sometimes a flash will be quoted in feet, which makes it seem ever so much more powerful than if quoted in metres, but there is of course no difference.

A second common confusion is use of ISO speeds. Most Guide numbers are calculated for ISO 100, which is traditionally a very common film speed. However, quoting at ISO 200 can make a flash seem more powerful, so it's important to check what ISO speed is being quoted.

So, getting back to the experiment, say we set up our flash 10 metres from our flash meter (and subject). We then fire the flash at full power, and measure the light output. Our flash meter, set for ISO 100, gives a reading of f/8.

To calculate the guide number for our flash, we simply multiply the aperture value with the distance to our subject.

So we get:

Guide Number = Distance x Aperture
Guide Number = 10m x 8
Guide Number = 80m

So our flash has a Guide Number of 80 metres at ISO 100.

For another quick example, lets say we've bought another flash that is rated at a Guide number of 360 feet @ ISO 200. Given this incredible Guide number, it had to be a good deal, and much better than the flash we already had at 80m @ ISO 100, right?

Well let's work it out:

Since quadrupling ISO speed means we double the Guide number due to the Inverse Square law, doubling ISO speed means we multiply the the square root of 2 to get the Guide number. However, since we're wanting to half the ISO speed, we therefore divide by the square root of 2.

Converting to ISO 100, we therefore get

360 feet @ ISO 200 = 254.6 feet @ ISO 100

Converting feet into metres, we get

254.6 feet @ ISO 100 = 77.6 metres @ ISO 100

So despite the very high quoted guide number, it turns out this flash isn't actually as powerful as our first flash.

So what other trick do manufacturers have up their sleeves?

Besides using feet instead of metres, and higher ISO speeds, to make numbers sound more impressive than they are, manufacturers also have a couple of other possibilities for their marketing departments to make use of.

The major one is the hazy description of "correct exposure". In general, a manufacturer will opt for a slightly dark exposure, because this will make the Guide number of their flash higher. You, on the other hand, might feel this is too dark, and would want a brighter photo, so your Guide number wouldn't be nearly as high to make the photo the way you like it.

Another one is only an option for manufacturers of small flashguns. Most of the half decent flashguns on the market now have a zoom capability. As you zoom your lens, your camera sends signals to your flash to tell it to zoom in. What this does is modify the way the light is directed, and make the output of light more efficient for a given power of flash burst, simply because more of the light given out is directed towards the subject, rather than lighting all around the subject.

So why is this important? Well when the flash is zoomed in, it has an effectively greater guide number than when it is zoomed out. So you can guess that the manufacturers will make use of this, and quote the Guide number of the flash at its best zoom position.

The best advice therefore is to do your own tests when you get a flash, if it matters to you to know for sure. That way you know there hasn't been a marketing department involved in the Guide number you arrive at.

Tuesday, 25 September 2007

Cool shots

I came across a photographer from across the water who has some cool shots. Got a great studio too if you like looking behind the scenes.

There's a lot of good stuff on his pbase account at:

http://www.pbase.com/infocusinc

And his main company site too, although a lot of stuff on it is already on the pbase site.

http://www.infocusinc.net

Enjoy :)

Saturday, 1 September 2007

Edge lighting glass

Sometimes, you want a pretty eye-catching graphical shot of a glass item. It might be a wine bottle, which you want to make anonymous, so you want to light it and avoid showing the label. Of course, you can still light the label, perhaps with a snoot, and just use this technique for dramatic purposes.

I didn't have a wine bottle to hand, but I did have a rather interestingly shaped bathroom perfume thingy. It has blue liquid in the shaped central area, but that won't show unless you light behind it. Same goes for a wine bottle, glass or whatever. You'll get some of the colour from the contents on the edge of the glass, but the centre will usually be pretty dark. There's some physics in there relating to reflective angles, but it's not that important.

So here's my first shot. I placed the perfume glass on a black shiny base, and used my lightbox. This is the exact same initial setup as used in the previous entry for the wristwatch.

I put a 550EX (equivalent to Canon 580EX MkII) flash on either side, lighting most of the diffusers, to create a soft light on each side. This resulted in the following image.


You'll see the top isn't particularly well lit though. On a bottle this wouldn't matter, because it has a top that isn't glass. In this photo though, it's a big deal, because the top edge isn't standing out very well.

I therefore got another flash in the form of a 580EX (equivalent to Canon 580EX MkII). I put it on a lighting stand, and used the lighting stand at an angle, balanced, to support the 580EX above the light box. It's a quick and dirty way to do it, but it works for speed. You can see in the following image, it fills in the edge at the top a bit better.


This is the setup for that shot above.


It's not bad, but the edges aren't all that sharply defined. Ideally the edges will be a thin line.

The further back you move the light source, the steeper the angle of reflection is, and therefore the thinner the edge light shows on the product. So moving the flashes to just light an area at the back of the diffuser, I get the following shot.


You can see how the setup has changed in this image.


Tuesday, 28 August 2007

Faking Sunlight

Just a quick entry today. You can sometimes create a bit of visual interest by playing with the colour balance of your flash. A warming (CTO) gel can make the effect of low evening sunlight when your camera is balanced for daylight, or even sometimes "cloudy" white balance.

I had two layers to this photo. The first was the background, which included the sky and the tree. Short of some serious power flash at a ridiculous distance (to keep flashes out of frame), I wasn't going to light the tree. So the tree and sky had to stay relative in brightness. I opted for an exposure which was a little bright on the sky, but still kept some detail in the tree, albeit sufficiently little it's almost a silhouette. This was around 1/200s at f/9, ISO 100.

This left the hay bale with some detail, but still pretty dark in the frame. I firstly set up a flash on the right, warming gel on, pointing at the round face of the bale. Given the exposure at f/9, ISO 100, I was hitting 1/1 power to get it bright enough. It still looked a bit like flash though, so I stuck on a second flash at a lower level, clamped to the light stand. This put some highlights along the grass, and made it look more like sunlight coming through trees.

The last step was a little fill from the left on the outer edge of the bale, which was still too dark a touch. I opted for a un-gelled flash for this to match the colour temperature coming from the sky better, and add to the effect of low sun breaking through the clouds through trees to pick out the bale. I aimed the flash up a touch so it feathered the light on the bale, and didn't light the ground.

The important thing is to make sure you get the "sunlight" flashes to light the ground evenly enough to the edge of the frame so it looks like a very distant light source. Using the double flash helps achieve this look.

The end result, at least to someone not in the know, is what looks like sunlight on the bale.


Here's the three light setup. Pretty simple, but does the trick.

Sunday, 26 August 2007

Cheap and cheerful ebay shots with a lightbox

I mentioned using a lightbox I'd bought at maplin in my last post lighting a wristwatch.

This time I want to look at something a little less arty, and a bit less complicated. Suppose you just want a decent quality shot of some stuff you're selling online, such as on ebay, and you feel a cheap lightbox such as the maplin one is worth buying, it can be pretty simple to get some decent images with little money spent.

Normally for my product shots, I use one, two, three or even four off-camera flashes and various diffusers (either on the lightbox or others), light modifiers, reflectors and gobos to get the effect I'm after. Flashes can be pretty expensive, with even an old but decent one with manual controls being £30-50. My latest Canon 580EX was £260, so they aren't cheap.

So I'm going to make a few assumptions here. Firstly that you have a digital camera of some sort (or a film camera and scanner), and that you can set the white balance on it. Secondly that you have some method of supporting the camera for slow shutter speeds, to make sure your images are sharp. If you have a small P&S, this can be one of the little table mounted tripods, although if you have a dslr, you will need something a little more substantial depending on the weight of the camera and lens.

I'm also going to assume you've gone out and bought a small lightbox, and either own or have bought a couple of small desklamps. These lamps have the advantage of being able to flex into almost any position, and are very very cheap. Around £5-10 in Asda, and possibly cheaper elsewhere.

I didn't have much time to put this together, so I took advantage of a high ISO speed and wide aperture to allow me to hand hold the camera. This has given a touch of noise and the shallow depth of field shows, but otherwise the images show the effect of the lighting. At ISO 100 and f/8 (something I'd opt for on a dslr normally using flash), I'd need a shutter speed of around a second using these desklamps, so you can see that a tripod is very important if you want to use a low ISO speed and have sufficient depth of field for your product.

So here's the first shot from my setup.
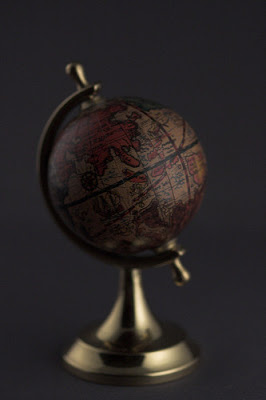


Nothing particularly special. Here's how it was done.
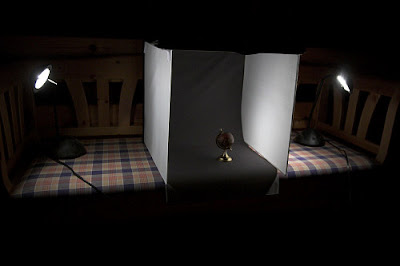


Switching off the left light, you can see the right light provides not only light on the right hand side, but some reflected light from the other side of the lightbox. This is mainly only visible in the shiny base of the globe.
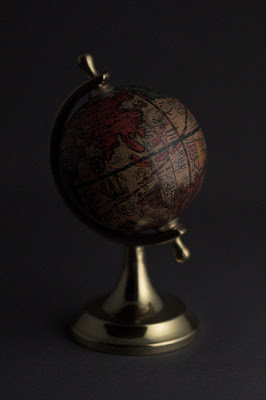


You can see the same with the left light.
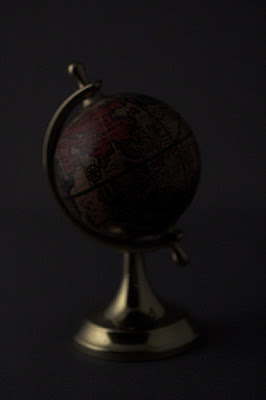


Switching off the left light and putting on the right hand light again, you can move the light closer to the diffuser (be careful leaving this too long in case the lamp gets hot - I don't accept responsibility for house fires!) to give a slightly brighter (since the light is closer) and more contrasty (since only part of the diffuser is now lit) light.
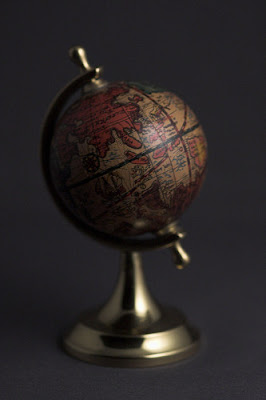


Pulling the right hand light back, switching on the left light and moving the left light in closer and further back, I create quite a pleasing little highlight on the globe.
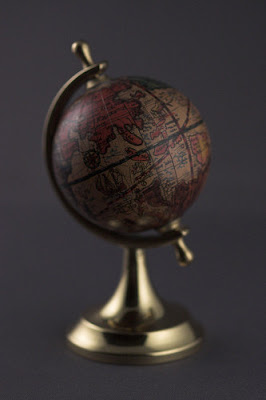


You can see in this shot how the left light creates a very defined area of light on the diffuser, while the right hand diffuser is fairly evenly lit.
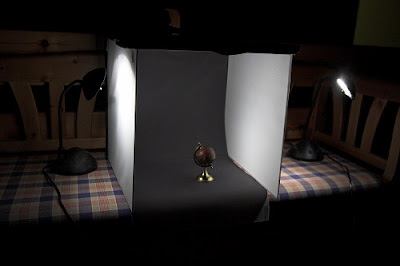

Ignoring the difference in distance/brightness of the light, this gives you control of the reflections on shiny items. On non-shiny items, you don't really need to worry about the object highlights...only the shadows on the background.

You can see in the following shot, where I did without the diffuser, not only do I get a very harsh set of highlights on the globe, I get a shadow on the background. That said, it does give a nice contrasty shot, and shows the details on the globe. In certain cases, contrasty light can serve you well, such as in bringing out detail, texture and colour in food on plates.
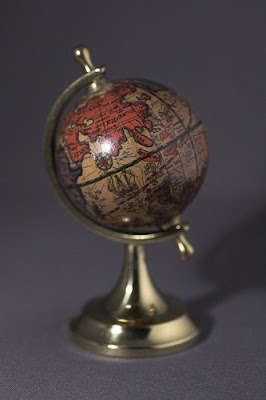


Here's how that shot was done. You can see I just bent the light round the front of the lightbox, while using the right light to fill in the shadows from the left light.
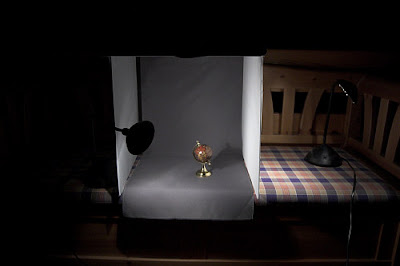


The benefit of this is pretty clear. £20 for the lightbox, £1 for each different colour of background (A2 paper) you want other than the grey/blue background provided, and around £10 for two lamps isn't much to pay for some pretty decent shots of products with little effort.

So what are the downsides? Firstly, you can't control highlights and brightness simultaneously. If I want a contrasty light on the left and a soft diffused light on the right, the right hand light must be further away from the product, and will therefore be darker. If I want the same brightness level, I'm pretty stuck. I either try to darken the left lamp by some method such as Neutral Density filter sheet, or I use more than one lamp on the right to increase the brightness (and the expense on lamps). With flash, you simply move it further away, and set the brightness up a touch.

The second problem is that you need a dark room, which isn't always that practical. If I'd shot this during the day in this particular room (which has no blinds), I'd have had a confusing mixture of white balance between cold daylight and warm tungsten. In some locations, you can't even switch the lights off, such as in some large offices, and often using fluorescent lighting, you'll get a horrible colour cast on your images. Given the long exposure for these lights, you really need very little light coming from elsewhere. With flash, even pretty small bursts will overpower the light in most rooms at the distances we're talking about, so ambient lighting isn't really an issue in your shots.

Everything I've demonstrated can of course be used right off with a couple of flashes and some method of holding them in position such as a lighting stand.

The object of this post is to keep it as simple and cheap as possible, but if you want to go further, either with desk lamps or flashes, try thinking about how you can use added diffusion, reflectors and gobos to control the light further, and create some interesting effects. If you're using desk lamps though, please remember they get hot!

Sunday, 12 August 2007

Product Photo: Wristwatch on Black Background

We start with the black base that we're going to have for the image. It's a smooth food preparation mat which I got out of the local supermarket. For speed and simplicity, I have a small light box which cost me £10 (on special deal - normally £20 at maplin - seems to be a deal going on instore). It folds flat for transport/storage, and can be set up in seconds when needed. This too expensive, or awkward to get? Just use the strobist approach for next to free. For convenience though, splashing out is well worth it.

We then add two flashes on either side, both at the same low power (we're just wanting to add highlights, not actually light the watch). They are zoomed in so that they don't fill the entire diffuser, giving a softer edge to the watch highlights.


Nowhere near it, but it's a start. We next add a single flash in behind the watch, to the left hand side. This fires upwards and bounces light off the top diffuser of the light box. It is similarly zoomed in, and relatively low power.


The above image is pretty close, but the light isn't very even. We need to fill in those dark downward shadows to create a more polished look. For small products like this, I have small reflectors made up from foam core board. I have cut them to allow a small piece of foam core board to act as a stand. They can be positioned and angled wherever required. You can see them more closely in the video at the end.


That's the final image. With a bit of photoshop work to take out the light on the bottom black area, a quick curves adjustment and cropping, this is the final product shot.


Here's a couple of setup shots.


Here's the shoot video to see all the stuff in between, and also get a closer look at those little reflectors.

Wednesday, 8 August 2007

Product Photo: White Background for Eshop

One of the most standard product photos is the white background shot. Used all over the net on almost every eshop, it provides a clean modern look for any product. However, it can be a tricky shot to pull off, especially if your product is also white!

We start with a white paper background, adding the product, and then adding a flash to light the background.

You will see from the image above, the "reflection" is very diffused. By changing to a smooth piece of board, we get a more defined reflection of the product. We also get a better, brighter reflection from the white background, making it easier to create that smooth white background.

We can see that being backlit, the product is rather dull at the front. We can add in reflectors on either side (just the same shiny board as we used underneath the product) to give some fill light to the front of the product, reflecting light coming from the background. It also helps to smooth out the shadow in front of the speakers.

This looks a fair bit better, but the product could still do with a little more punch. The goal after all is to sell these speakers on an eshop! Adding a second flash at low power gives a touch extra light, which is also more contrasty and directional. Using the zoom function means most of the light is concentrated on the product. Since the background is already going to be white, there's no need to use a snoot.

The flash is a bit too far right, so isn't really getting quite enough light on the front of the product. You can also see that the background flash is a little dark. We're still seeing some detail in the background.

To solve this, the front flash is moved a touch left to make the light fall better on the front of the product. The background flash can be increased in power by 1 stop (I'd probably have opted for 2/3 stop if I was using a 580EX, but it was a 550EX on the background). It's not far off though.

This results in quite a nice image, but the right hand speaker seems a little lost in the white background. By moving the background flash a touch left, the falloff of light on the background can be changed at the right hand side, and the speaker becomes darker (it is reflecting the background), along with the top right of the background.

After a crop and a slight curves adjustment, along with a very quick dodge at the top right to make the background fully white, this image is ready for an eshop.

So that's how a simple white background product shot can be set up, and how controlling the light can allow a white product to be made fully visible.

Here's some shots of the setup:


If you'd like to see all the in-between boring stuff, you can watch the entire shoot for this image. Don't worry if you don't catch all the text in the video... it's basically the same as the text above!

Saturday, 21 July 2007

Folding a popup reflector

Folding a popup reflector can be a bit tricky till you've done it...once. Getting to that point isn't always that obvious though!


A question came up on photosig asking how to do it, and despite some really quality descriptions, I could see it might not be that obvious to those who hadn't done it before. So here's a quick video to put words into images.


http://www.youtube.com/watch?v=TTWbsbeBIJ0


(apologies to anyone who's eyes I'm offending with the white balance drift on this video...)

Saturday, 30 June 2007

Product Shots: Behind the Scenes

I was asked to photograph this new engine. Unfortunately, it was in a rather dark and damp workshop, on a workbench next to a roller shutter door. The rest of the place was even worse, so I figured I best make a shot out of where the engine was.


I had a main light (into an umbrella) to camera right to light the engine, and also provided a reflection on the roller door behind. I filled in the shadows with a silver reflector at camera left, and then added some red light with a gelled flash pointed at the roller door from behind the engine (you can see the lighting stand underneath the workbench). Simple setup, and took around 10 mins to set up, shoot and dismantle.

Wednesday, 30 May 2007

Product Shots: Behind the Scenes

This journal entry is based round a product photo, and some overall shots which show the setup. There were two tricks to this shot which I thought were worth some mention. The first is how I got the gradient colour background from purple to silver, and the second is how I got smooth clean lighting on the screen, without any harsh highlights. So first of all, here's the shot.


The gradient background is actually pretty simple. I got some silver paper which reflects light quite a bit (you can see the reflection of the multimeter at the bottom). The top of the image reflects light in front of the multimeter, and the bottom reflects light above the multimeter. So therefore the colour you want at the bottom should be softly lit from above, and the colour you want the top should be lit from the front. For this reason, I just used the light I was lighting the multimeter with to light the top of the background. I put a softbox in above with a purple gel filter for the bottom part of the image, and the shape of the background paper makes the gradient fill work.

To smoothly light the screen, I needed a soft even source of light in front of the multimeter. To do this, I got two white sheets of foam board to the left and right of the camera angle. Two flashes fired up towards these boards, reflecting and creating the light source. I angled the boards back to drop the light off towards the top of the multimeter, making the screen a bit easier to read.

For a bit of added punch, I used a warming Daylight -> Tungsten conversion filter gel on the flash to the right of the camera, and you can see its given a warm colour to the highlight on the right of the multimeter, and also made the light on the front of the multimeter nice and warm.

So that's all there is to it...pretty simple. Here's some shots of the setup.


Lighting Modifiers: Honeycomb style "snoot"

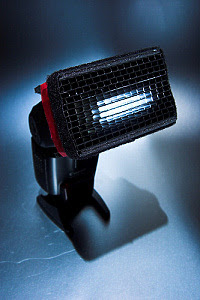
I'd been reading about honeycomb filters being made out of cardboard and correx plastic sheets. I got a hold of a sheet of black correx (I had loads of the stuff, but unfortunately no black) to try it out. I simply cut two strips 4 cm wide across the grain (holes through the correx travelling perpendicular to the cut). I then cut these into sections slightly wider than the flashgun head. I glued them all together in a stack, then using some foamcore board, I made a 6cm top and bottom which I then glued to the correx boards. I then put on some red tape to hold the whole lot together (I don't trust glue fully when things get bumped about) and a line of velcro strip like the flashguns have to let filter gels be attached if necessary. It also serves the dual purpose of backing up the tape in holding the whole lot together. To finish it off, I put one line of the hook velcro strip on the inside where the flashgun sits, so the honeycomb is held firmly onto the flash. With a little twist, the honeycomb easily goes on and off the flash.

Here you can see the honeycomb on the flash viewed from just off axis.


In the following two, you can see in comparison how the light falls off as you come off axis, showing how the honeycomb focusses the light beam.


Here you can see the honeycomb attachment to the flashgun, and also how slim a beam it provides on the background. This is as tight as the beam provided by the longest snoot I have made before, which is about 8 inches long. I find the falloff much more pleasant than a snoot provides. No double shadows which is a definite plus!


While they're not quite as light efficient (all the bits blocking light), they are very space efficient. A long snoot takes a lot of space in comparison to a 6cm by 10cm by 4cm honeycomb. In actual fact, this honeycomb is actually a little too long. Its beam is very very direct. I might well make a shorter version which isn't so direct.

Advertisement