Sunday, 14 December 2008

Pantone Huey Pro


Most of the stuff I talk about on this blog tends to be very much based around the point of capture. Lighting and cameras are a huge part of what I do - I'm very much a believer in getting things right before clicking the shutter button, rather than spending hours fixing hundreds of images in post processing. However, like all photographers, post processing is equally a very time consuming part of the deal.

For a long time I worked happily with monitors I'd calibrated by eye so that they showed something roughly approximating what they should, but I started to work more critically on certain jobs and that was a turning point for me. I needed to know that what I was seeing on my monitor was accurate. Some of the calibration tools out there are unbelievably expensive, so they were ruled out quickly for me. At the other end was the relatively cheap Pantone Huey. Having had a chat with my local camera store, I quickly ruled it out because it only supported a single monitor. No use for calibrating my dual monitor setup.

The next model up was the Pantone Huey Pro, which did offer multiple monitor support, which was the major selling point for myself. In addition, like the Huey, it offers ambient compensation where it controls the screen brightness based on your surroundings. Useful if you have a window nearby which makes the room brighter or darker depending on the time of day.

So, having purchased the Huey Pro, plugged it in and installed the software from the supplied CD, the installed application came up and gave clear instructions throughout. There is one word of warning though: During your first calibration, the software checks to see you can see certain graduations of tone, in order to check that your brightness and contrast are fine. I personally opted to say I couldn't see them properly (even though I could), so that I was given further options to fine tune my brightness and contrast. This gave a much more critical black/white point accuracy.

Other than that, everything is totally self explanatory. When asked you stick the Huey Pro to the monitor with its small suction cups, and the monitor then displays test colours for the Huey Pro to check. My only slight problem is that the first time I hadn't stuck it well enough and it fell off, even though I'd done as suggested and cleaned the screen first. Just to be safe, I then just gently held it against the screen, being careful not to press too hard or the LCD screen can show discolouration. Holding it up against the monitor for the <2 mins the calibration takes really isn't a big hassle.

Having calibrated the screen, you'll likely feel it looks very warm compared to a manually calibrated screen. This is fine, and you get used to it very quickly as your eyes adjust. Try it for a day, and then switch back to the uncorrected colours, and it'll look very blue! It's just a matter of changing what you're used to.

Having done this, you should start to see things very much more clearly. No missing badly cloned areas in the black or white areas, and you have a greater confidence that what you're seeing is right.

Another thing I love about the Huey Pro is the simplicity with which it makes multi-monitor calibration straight forward. Many products would make you pick the monitor in a screen which lists them, but the Huey Pro does the obvious thing - you drag the software to the screen you want to calibrate, and then press the button to start the process. Brilliantly simple!

Since I bought this product, I've noticed a couple of things. The main one is that when you set the screen to update based on ambient light (you can set from 10 secs upwards - I opted for every minute), you'll see the Huey Pro flash its red LEDs and then if the ambient light has changed significantly, you'll see the screen brightness change. On occasion though, the ambient hasn't changed, but you get a small flicker for a fraction of a second where the Huey Pro software seems to remove its colour correction then reapply it very quickly. This may annoy some people, but it's not something that happens all that regularly, and I can't say it worries me much.

It's a well designed product, and unlike many products nowadays, has matching well designed software. I've often said that the best products are ones you use every day, and hardly even think about the fact they exist. The Pantone Huey Pro is a prime example of such a product, and at a very competitive price as well.

Sunday, 23 November 2008

Bringing back the '80s

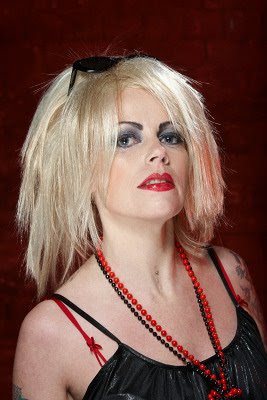
Sometimes you get a concept and, to be frank and honest about it, you wonder if it's all that great an idea. This shoot was one of those for me. The model wanted to be Debbie Harry (Blondie) for an 80s style shoot. Now I'm seldom one to walk away from a challenge, especially if saturated colours are involved, but lets be honest...most 80s photography has dated quicker than just about any other decade of photography before it!

So I figured a set of photos which looked dated were out of the question, so the only option was to drag 80s style into the 21st century, kicking and screaming. I went on the offensive through google images, youtube etc. looking for all the blondie material I could find, taking specific note of lighting styles. Lots of overly bright hair lights either from above or directly behind were the order of the day. That and excessive use of the clamshell lighting style. Clamshell is simply having two soft light sources, one above the model's face and one below, giving a very even flattering light, and a characteristic double catchlight in the eyes.

So for the first set of shots, I jumped straight in there on the clamshell look. Often in fashion shots, you'll see a high light directly above the camera which gives a very defined fashiony look. So I tried to take a bit of a half measure between full blown clamshell and fashion lighting by using a diffused shoot thru umbrella above modifying the light from a 550EX (equivalent to a 580EX II), while keeping the bottom half of the clamshell lighting a little more subtle by using a silver reflector, which I could control by bringing it up and closer, or down and further away. A single 550EX flashgun (equivalent to a 580EX II) on a boom arm up behind for a hairlight, and we were all set for an 80s feel.

So here's one of the shots from this first setup


Combined with the smoother more modern digital cleanness of the image, the lighting gives the 80s feel, but without looking dated (hopefully!)

I then opted for another look while the model was having an outfit change. Decided this time to go for a backlit look, with a really saturated colour. When I saw her red top, I tried the red gel on a 550EX (equivalent to a 580EX II) used for the background in the previous shot, but it was way too much, so I stuck another primary colour on in the form of a blue gel which had a lot better impact. The blue light gives a good edge all the way round her, bringing her out from the background well. I didn't really change from the clamshell lighting all that much, but moved it around her. In this case, the umbrella was up above her, but to camera left, while the silver reflector was down level with her arm, and bouncing light back under her chin etc.


Again, hopefully some of that 80s style the model was after, but again without looking dated.

We had a few minutes at the end of the shoot, and I always love a little bit of light relief just before we wrap up. Our makeup artist had seen a photo of Debbie Harry pretending to lick her record, so we decided to make our own version of the shot, and I'd got a Blondie record especially for the idea. Debbie Harry didn't have a tongue piercing as far as I know, but for me, it totally makes this shot. A real attention grabber. That and the kiss on the record...totally love it!


Lighting for that shot was pretty quick and dirty, given we were all wanting to get away. The background was the side of a large white 20ft container, hit hard with a single 550EX flashgun (equivalent to a 580EX II) on the area behind the model and record. Lighting the model was the umbrella from the previous shots, off to camera left, at a steep enough angle to not create nasty highlights on the record but show some texture never the less. Can't remember right off, but I might've reflected a little light back into the models face with a white reflector, but either way, it was only subtle fill if I did. Oh, and the secret of getting the model's tongue so close to the record when she didn't want to risk licking a dirty old record? Bring the record forward...the compression on a long lens means you can't tell it's not in line with her tongue!

Saturday, 25 October 2008

Feathering the light


The shot above is one I took recently. The eagle eyed among you will spot it's a three light setup. You can see the setup in the pic below, albeit without the third background light which I added later with a purple gel about 50 metres down the warehouse. If you're particularly eagle eyed, you'll notice I had the background flash sitting next to the left flash, and it was on but not gelled, so fired as well.


The point of all that was just to save me a lot of setup description - much easier to show a picture. The actual pictures which are of interest for this post use a slightly different setup, but only slightly. You'll see that I moved the umbrellabox round to the left, as our model turned round to face the column.


What you may not have appreciated is the importance that feathering the light played in this photo. I've seen various blogs (particularly David Hobby's Strobist blog) mention feathering the light, often in terms of a bare flashgun. It's hard to do that with a brolly though, because it bounces light pretty widely. However, with a softbox, or in my case an umbrellabox, you have a much greater control of the light.

Here was my first shot after I moved the light from the far side. I just pointed it straight towards her, and when I fired off a shot, I saw the beam reflected an awful lot of light.


So what I was looking for was to light only our model, and not the beam, or not that much anyway. So I turned the umbrellabox round so it faced across in front of her. That meant only the edge of the light was catching the beam, while a bit more was catching our model. The upshot of this was the beam isn't too bright, while the downside is that the light is a bit more contrasty on her face.


Going back to the photo I made after this, you'll see she moved back away from the beam. This means that the beam is in the feathered edge of the light, but the model is moving more into the main patch of light created by the umbrellabox. Not only that, but by moving away from the beam, she's moving to a position where the umbrellabox seems apparently bigger to her, so is softer light.


Think of it in this way - if you turn the umbrellabox to 90 degrees from your model, its effective size is zero square metres, even though it might be 0.8 square metres when pointed at her. By turning it, you're reducing the size, and effectively making a feathering version of a stripbox, which gives a brighter light towards the direction the umbrellabox is pointing.

There are plenty of other uses for feathering light, such as giving a nice vignette look to your images. A softbox or umbrellabox really does make this an easy thing to do.

Saturday, 27 September 2008

A little splash of colour

Often on a location shoot the location isn't everything you'd hope for. It might be absolutely beautiful, with ornate backgrounds, but painted a yuck colour of brown. It might even be a beautiful colour, but ridiculously dark. Either way, it's not just the model you need to think about lighting, but that background as well.

I did a shoot in a bar/restaurant recently which was one of the former - beautifully ornate, stunning location, but dark and dull. There was a balcony area, for example, which had amazing pillars and ornate metal work. The background was tiles which isn't all that bad (nice smooth undistracting background), but it was a sickly coloured green of all colours. There were four dull lights from above giving light in the corridor that the balcony is part of. There was nowhere near enough light to do the shot without flash, and even lit, the sickly green wasn't going to be making any nice shots. Cue the gel filters!

The following is a setup shot for the first set of shots I did with the balcony.


You can see it's a two light setup. I used a yellow gel on a 550EX (equivalent to the Canon 580EX II) which really warmed up that horrible coloured tiling. You can see on the left hand side what the tiles actually looked like. The second flash is a snooted 550EX (equivalent to the Canon 580EX II) fired from the opposite side of the room from the balcony about 6-8 metres away, to provide light on the face of the model. Thanks to Mike for being such a stunning model for this one!

Unfortunately, this young lady kicked him off the balcony for the actual shots.


Another model? Want another style? It's as easy as swapping the coloured gel on the background 550EX flash (equivalent to the Canon 580EX II). 10 secs to change!


Here's another two light setup from the same shoot. This time it was a grand piano which we planned to have the model perch on for some shots. In behind was some remarkable objects attached to the wall. Haven't a clue what they were, but they weren't all that pretty. Jammed in a blue gel on the background light though, and instantly they took on a whole new feel.


Here's one of the shots from this set.


Again, a change of feel to the shots is as easy as a gel filter change!


It's a comforting feeling to know you have the option of turning up at a location, and almost no matter how ugly or dark it is, you can bring new life to a background with a great big splash of colour.

Tuesday, 9 September 2008

The witching hour!


Had an interesting concept for a shot recently...a witchcraft style shoot. I'd discussed some ideas with the model in the shot above, and one thing had led to another and the idea of a witchcraft shoot came about.

There was a degree of complexity in the exposure here because of the use of candles. While your eyes adjust to them, and they seem bright enough in the typically dull environments they are used, in reality they are extremely dark. Put your camera on ISO 800, f/2.8 and you'll be lucky if you expose them correctly at a shutter speed any faster than 1/30s.

Therefore a shoot which involves combining flash and candles means a couple of things must be accounted for. Assuming you don't want ridiculously high ISO speeds, or virtually no depth of field, then you're going to have to deal with long shutter speeds. This means nothing can move during the shoot, so you need the model to stay very still for each shot, and you also need to have the camera on a tripod. It can also mean you can get a little creative by purposely having the model move though.

Secondly, given you've picked a higher ISO speed and wide aperture, your flashes aren't going to work hard at all. Where you might normally work with 1/2 power on a decent flashgun, you might easily find you're work at 1/32 power or something of that magnitude. Virtually no strain on the flashguns, so your batteries will last for ages.


A wee bit about the setup. You can see in the shot above how controlled the light is. Every source of light is carefully directed using honeycomb snoots. Only the purple gelled flash is hitting the background, while the CTO gelled flash is directed at the model, missing the background completely. The exposure for ambient is such that a little warm light from the candles can be seen on the model, but not enough to lighten the black background roll noticably.


In the last shot above, you can see the setup. The two flashes mentioned are on the left, one purple gelled, and one warm gelled, which you can see is firing at the ground on the right of the background paper. There's also a flash on the stand which is lying on its side. It wasn't used on the shot at the top of this post, but I added it in later with a warm gel to create a bit extra light on the model as if coming from the candles. There are also two circular 5-in-1 reflectors which are being used to block ambient light coming from windows, which were giving a colour cast in the images, as well as lighting the floor of the background paper.

Thursday, 28 August 2008

Summer's day shoot, on a dull late evening


OK, take a look at the shot above. Deconstruct the light. How do you think it was shot? What lighting was involved? What was the ambient light like?

If I said it was dark, miserable and cloudy with no sunlight, about 9pm at night, would you be surprised?

We'd been looking to do a shoot on a nice sunny evening, with a casual style in a wheat field. There were a few problems, not least there were virtually no sunny evenings going (all rain or dull) and by the time we got the shoot arranged, the farmers had all just done their harvesting!

Suffice to say, we ended up in a field just off the side of an industrial estate, in very low grey-blue light, having to invent a little summer.

What you will have figured out by now is that there were two light sources. One from camera right lighting the model's face, and one from camera left, over his shoulder. The one from camera right looks like flash, and you probably even guessed that it was a bare flash from the catchlight. You'd be correct. The other source of light hopefully passed as sunlight without much of a thought, if I did my job well enough. Again it's a bare flash.

The trick to this was a couple of CTB filters which cool the light output from the flash. On the flash to camera right I used a full CTB filter, and on the flash to camera left, I used a half CTB filter. When I shot the images, this gave a horribly blue tone to the model, which probably un-nerved him just a touch as I showed him the back of the camera.

The secret is that you're making the daylight balanced flashes cool so that they put out a colder light than the already blue-ish ambient light. When you process the raw file out the camera, you then warm the image right up to about 14,000K, and a slight tint change if necessary. The ambient goes a warm summery glow, your half CTB filter looks slightly warmer like sunshine, and your full CTB looks just enough cooler to look like normal daylight flash used at sunset.

There really is no excuse for blaming the weather for a lack of good shots!

Sunday, 24 August 2008

Bit of a first for me

OK...so you want a what kind of shoot? Gothic style? So that's, um, like black clothes and lots of makeup?

With that level of knowledge about the subject matter, you can't really go wrong!

Sometimes it's fun to push yourself out a bit further from the shore and do something you haven't done before.

Most important thing after the model for this type of shoot is a good make up artist. Without a makeup artist, the gothic style shoot ain't gonna be gothic! We were very lucky to get a really great makeup artist for the shoot. You know you've got the right makeup artist for a shoot like that when she pulls a pair of handcuffs out her jeans...not something I see everyday I have to confess!

So anyway, down to the shots...

I picked out ones for the blog here, not because they were the best pics from the shoot, but because the lighting was worthy of comment.

For a part of the shoot, the building we were in was very neglected, cold and damp. I wanted to really give the images this feel. A CTB filter is commonly used to give a cold blue look to images, but I wanted a really chilled damp look, so in addition to a 1/2 CTB, I added a 1/4 plusgreen to give a really potent chill.

For this first image, I had an umbrellabox high to camera left with the bottom just level with the model's eyes. I had a second flash on camera right behind the model and a fair distance back. I used a honeycomb snoot to direct the light in a line up the steps, giving good separation for the model, as well as maintaining the brightest area towards her face. There was a tiny touch of ambient fill, but only enough to barely bring some areas out of the darkness.


I saw this graffiti which said ACID and was quite drawn to it. Especially with the model's real acidic look going on. I think she was getting a little too much into character!

For this shot, I used the same umbrellabox, but this time low and to camera right, side lighting the model, but being forward from the model, giving enough light on her face. This time, we were close to a light grey cement wall on the left, so we got some nice fill reflected on to her face. In the background, I used the same honeycomb snooted flash to light the ACID graffiti.


The last image was a bit of fun really. I fancied the idea of the model being chased by a mysterious figure. You don't get much more mysterious than a makeup artist, especially in creepy silhouetted form!

Very similar setup for this shot. An umbrellabox to camera right, lower than the model, but turned away from her so that in effect she was lit by something approaching a strip box. Also prevented spill going back and lighting our mysterious makeup artist. For the background, I removed the honeycomb snoot and just fired the flash with the 1/2 CTB and 1/4 plusgreen filters, aiming it at the wall just behind our mysterious figure. I put it round the corner a touch, to block as much of the light as possible from hitting our silhouetted figure. A wee touch of light spill was dealt with after with a burn brush in PS, as well as some burning in of the left edge to balance the image better. I'm a fan of lighting over PS, but sometimes PS can have its uses!


Was a fun shoot, and we got quite a few other nice images, although the lighting on those wasn't as interesting - to you guys at least!

Thursday, 14 August 2008

20,000+ views

Been a bit over a year since I started this blog, and uploaded my first video to youtube. Been quite an amazing year, and had some great comments and chats with people I've contacted because of it.

So, I just wanted to thank everyone who's taken my youtube view counter over 20,000 just yesterday, and just shy of 5,000 views of my images on flickr. Totally amazing!

I hope I can continue to provide some interesting content (both video and blog) over the following year, and perhaps even gain some more readers, viewers and good friends with a shared interest in photography and lighting!

Thursday, 31 July 2008

Dealing with problems while staying open to opportunities


So here's the scenario...you're doing a portfolio shoot for a model. You get lucky with a lovely sunny day and have organised a good time for the shoot so the light is spot on. You've chosen some pretty decent locations to take the shots, and you're getting on well with the model. One of those good vibe shoots.

It's a relatively fast moving shoot, and you don't have an assistant available to help you, so the lighting is simple - single light stand, 550EX and a shoot-thru brolly. This gives you the option of hard light with the brolly out the way, or softer light through the brolly, and still remains easily portable. The model has brought along a voice activated light-stand, although she mistakenly thinks he's her boyfriend. In this case, he is coming in useful as voice activated ballast to keep the brolly from acting like a sail and blowing the light stand over.

Here's an idea of the setup (taken during a previous shoot)...


It's a pretty reliable setup. Canon 550EX providing the grunt, fired by a pocket wizard. The two are connected via a hotshoe adapter which screws on to the light stand. Gives me freedom to shoot from pretty much anywhere, at any angle, without any misfires (speaking too soon...).

In my hand I have my 40D, pocket wizard on top, 70-200 lens on the front. Also got a 15-30 lens for shots such as the top one and a 580EX as backup if my 550EX dies. It's easier to swap a flash on the hotshoe than change batteries, if you want to keep the flow going.

So, back to the scenario, everything is working fine. You're shooting away, with no problems beyond the re-charge rate of the 550EX being slow with 1/1 power firing every shot. It's a bright day, and one 550EX is being maxed out. You decide to opt for a shot in out of the sun a touch, so pick up the light stand and walk with it.

Give the model some direction about where to stand, then fire a shot off. She's a silhouette against the background. First thought is batteries on the 550EX have given up. A quick check of the back shows the rear is showing ready to fire, and I do a quick test pop to see it definately is. I get a reassuring pop and decent re-charge sound. Pocket wizard batteries? Hit the test button and it shows a correct triggering via the red LED. Must be cables? Check them and everything is connected fine! Um...

So you've got a problem, you've done all the diagnostics you can right on a shoot, and it's coming up short. What do you do?

What would you have done in this situation, with the kit available? Have a think, and then scroll down to see what I did...


OK, here's what I did...

I had a relaxed laugh, and made a quick joke about my equipment in the least nervous sounding way possible. It shows I've not lost my cool, and I'm not worried...still keeping up the relationship with the model. It also shows confidence in myself as a photographer by making jokes when my equipment is failing, rather than breaking down and crying. And thirdly, it's giving me time to think "oh crap, what do I do now? *quiver*"

I had the obvious option of forgetting flash and shooting ambient only. I actually did take a couple of shots with ambient light to give me some thinking time. It kept everyone around me relaxed about the situation.

If you remember from above though, I also had a backup flash in the form of a 580EX, to use if the 550EX died on me. I therefore had a basic master/slave optical setup available to me. I could therefore stick the 580EX on in place of the pocket wizard and fire my 550EX. A perfectly adequate solution, but now I was losing my backup flash if the 550EX ran out of juice.

So I whipped the 550EX off the light stand and replaced it with the 580EX, and used the 550EX as master to control the 580EX in slave mode. Why? Well, I knew the 580EX had full batteries which would give the most shooting time with these heavy full power shots. Meanwhile, the 550EX which had already been worked quite hard, could take a relative retirement just firing triggering flashes. Apart from having to think about line-of-sight issues with optical triggering, I was back to full steam ahead.

So what was the down time on the shoot? About 30-40 secs spread either side about 1-2 mins shooting. I took about 10-15 secs when I had the problem trying to diagnose it. I then dismissed the setup as a no-go, and continued with the shoot opting for ambient light only shots. Having formed a plan, I then returned to the light stand, swapping the on-camera pocket wizard for my 550EX, and putting the 580EX on the light stand, slipping it in to slave mode as I tightened it on. I then slipped my 550EX into master mode, and disabled it from firing anything other than triggering flashes.

It's important to have backup options on a shoot. Many photographers use any old flash because they have radio triggers to fire them in manual mode, but if this happened to them, they'd be stuck with ambient only. It's important to have a second relatively bomb-proof way of working, and ideally one which doesn't require equipment which is only use as backup equipment, or else you'll end up carrying around so much more stuff.

One other thing that occurred to me on this shoot was trying to stay open to other ways of working. As I mentioned, it was a beautiful day, with great light. It's easy to get into the trap of only lighting shots, so it's good to stay open to the possibility of ambient light shots.

In the case of the following shot, I was working with flash off to the right of these steps, and I happened to notice some light reflected off a nearby glass building was giving a lovely line of light up the steps. I asked the model to move so she was sitting right in the light, and grabbed off a few shots, before moving back to the other setup. Ended up being one of the nicer shots, and with nothing but what nature provided. Remember to stay open to opportunities!


I'll let you out of your suspense...

The wire had obviously been pulled or shaken a bit too much on the hotshoe adapter, and one of the soldered connections had become lose. An easy fix afterwards at home with a multimeter and soldering iron, but far from obvious and easily fixed while doing a shoot!

Monday, 7 July 2008

Wordle-ing along

Came across another blog which had used this tool, and thought it was kinda cool. Looks at the frequency pattern of words on the site. That's the first however many posts anyhow. Quite unsurprisingly "Lighting" is the biggest and most common. There are some other interesting and less expected ones though! :)

Thursday, 3 July 2008

Product Photo: Arran Malt Whisky


The shot above was done with a relatively straight-forward three light setup. As a starting point for this shot, I stuck a honeycomb on a 550EX flash (equivalent to the Canon 580EX II) and used it to get a good strong light on the label of the product. This is always important when you're shooting a bottle such as this.

I then wanted to show off the whisky itself, so I needed to shine some light through the bottle. The only alternative would be a light background, but that wouldn't have gone with the mood I wanted. I placed another 550EX flash (equivalent to the Canon 580EX II) with a CTO behind the bottle and did a test shot.


As you can see, it's a little on the hot side. Not only that, but light is spilling round the side of bottle. I therefore put on a mask which acts a little like a snoot, preventing too much spill. I also notched down the power a touch.


Nearly there, I had to notch down the power on the rear light another notch, to keep the highlight under control.


It's gone very contrasty and dull now, so putting a mini softbox with a CTO gel in above gives some fill, as well as stopping the top of the bottle from disappearing into the background.


The last step is some atmosphere in a can - Magican Smoke Spray - it's like a mini smoke machine in handy sprayable form. Great stuff!


Here's some setup images


Monday, 2 June 2008

Interesting Book: The Photographer's Guide to the Studio

I recently came across an interesting lighting book in my local second hand book shop. It's written by Roger Hicks and Frances Schultz and is called The Photographer's Guide to the Studio.

It's basically a complete guide to studio lighting, for animate and inanimate objects. The works!

There's two main sections, I guess it'd best be described as. The first contains five chapters:

1. Why Studio? - a short chapter looking at why you might want to do studio work, both for amateurs and professionals.

2. A Studio of your own - describing all the important things you need to know if you're contemplating setting up a studio of your own.

3. Your camera in the studio - where cameras, lenses and camera requirements are discussed. This section shows the book's age, with no mention of digital cameras. However, the information is often still useful and at least of interest.

4. Studio Lighting - a chapter looking at different types of lighting (tungsten vs. flash etc.), available modifiers, and other equipment in the studio.

5. Accessories, backgrounds and props - looking at other stuff in the studio which is less directly related to the lights, such as backgrounds, posing stools/tables/etc., props and so on.

Moving on to the second section, which in my opinion is the most interesting section. It is titled Getting the shot you want, and is exactly what it says. It divides into sub-sections which are each about four or so pages long, covering all sorts of studio photographs you might want to do, and giving advice and examples.

The sections are:


- Male adult portraits
- Female adult portraits
- Nudes
- Couples, friends and groups
- Subject supports
- Children and young people
- Fantasy and fashion
- Close-up and copying
- Still life
- Flowers
- Jewellery
- Pack and product shots
- Glass
- Food
- How-to and step-by-step
- 'Exploded' pictures

Most of those are obvious. The last two might be a bit confusing without explanation though. How-to and step-by-step is looking at studio photography for how-to books which shows each step in a process. This is looking at lighting which works well for a number of different shots for a consistent look, without having issues of moving lights between each shot because things have changed. Similarly, the 'Exploded' pictures section is looking at making studio photographs which demonstrate how products go together. Think of a pen - the top clicker section, the spring, the ink cartridge and the bottom section which screws to the top - all exploded out for a photograph. Well, this gives you hints and tips for doing it.

Last of all, there's an interesting little Appendix entitled "Deconstructing lighting" which looks at figuring out the lighting in photographs based on shadows, highlights, catchlights etc.

Given that the book was published in 2002, it does show its age a bit. The photographs aren't all that modern looking, and camera related information is entirely film oriented. However, if you can get past that, there's some really good information about the one thing that hasn't changed in 6 years - light!

If you're looking for a one-stop shop for studio lighting that will give you a guide whatever studio shot you're putting your lens towards, you could do a lot worse than this book.

Saturday, 17 May 2008

Spring Clamps


I've had a couple of questions regarding the Spring Clamps which I use to hold up flashes when I'm not using lighting stands. I also notice that some of the searches which lead people to my blog relate to these clamps, so I figured an entry might be of use to people.

First of all, the clamps which I use are sold by Maplin in the UK. You can find them here:

Maplin Large Photography Clamp

They're not as solid as proper clamps which screw tight, but they're much quicker and generally solid enough for most jobs. They have a rubber grip which is shaped so that they fit well on circular tubing, and the rubber stops them spinning too easily. With a 550EX (equivalent to Canon 580EX II) flash on though, don't expect them to hold themselves from spinning! The rubber also goes over the tip of the clamp which means they get a good grip on the edge of a table and such like.

One of the downsides of this clamp is that the flash is pretty big relative to it, so the flash can't sit properly vertically on the clamp. The ball head could be a little bit further from the clamp which would help with this, but it's a problem you can usually just about get around by some creative twisting and turning.

So what are the other options?

The first is to buy a cheap clamp, get a bolt and nut and make up your own with a bit of DIY. If you have a mini ball head from somewhere, you could even make it pretty professional looking.

At the other end of the scale is the clamp made by manfrotto. It's a little dearer, but it does have some nice touches. Major advantage that I can see, from looking at pictures of it, is that it has the ball head right up one of the arms of the clamp, meaning it's easier to make the flashgun clear the clamp when putting it at steep angles. The downside is that it doesn't actually appear to have quite as good a grip as the maplin ones, which have wider jaws and a better rubber grip. On a flat surface though, such as the edge of a table, the Manfrotto MN275 Mini Spring Clamp might grip a little touch better.

I believe that the Manfrotto clamp is also sold as a version with a hotshoe (or a coldshoe really) which is known as the Bogen (or Manfrotto) Justin Spring Clamp.

Sunday, 20 April 2008

Product Photo: CCTV Camera

Firstly, here's the shot:


It was a bit of a larger scale setup than you normally see on this blog. Usually I'm just working with a small background roll, either lit or not lit, which is nice and simple. For this shot though, I wanted to do something a bit different.

The CCTV camera is advertised by the manufacturer as being for high security applications. It has very low light performance. That is the two main directions of the manufacturer's literature, so I wanted to make a photograph that showed these two things. I knew that I'd want it to be relatively low key, and probably a blue-ish tone (which incidentally goes with one of the colours normally used by the manufacturer in their literature) which suggests night time, and to represent the concept of high security, I figured a military look would be good. I had a camouflage net kicking about, so I decided to put it to good use for the shot.

So, as for the setup, it's almost on three planes. The first plane is the product, the second plane is the silhouetted camouflage net, and the third plane is a large reflector with a flash lighting it.


You can see the lighting on the product consists of a small flash with a striplight modifier vertically above the product, two silver reflectors lighting the front and underside of the product, and a second flash to camera left bouncing off a white reflector to give some blue fill around the lens and front of the camera. This was to give a feeling that the camera was looking into the blue night.


Here's an alternate view from the rear of the CCTV camera.


Here's a view of the camouflage net, which is suspended from a background roll holder with two clamps. In the photo it isn't lit at all. I turned the striplight flash towards it to make it visible for this shot.


And the most important part? A bit of sticky tape to keep the iris control wire for the lens nicely tucked out the way. Nothing worse than dangling wires on a product shot!

Thursday, 10 April 2008

Scottish Strobists?


Chris Frear who's a member of the Flickr UK Strobists group has contacted me regarding organising a get together for a mini strobist event. Don't think it's likely we'll get a Seattle level of people, but it'd be nice to get a good handful. I'm counting myself in if I can possibly make it, and I know from my stats there are a small bunch of you from Scotland, so I'm hoping you'll read this and leave a comment if you're interested in coming, or go to the Flickr UK Strobists group and leave a message if you're a member.

No date as yet, but somewhere down near Chris at Thornhill, near Dumfries seems to be the location as of the moment.

I'll try and keep things updated here for any non-flickr members who're interested.

Wednesday, 19 March 2008

Lastolite Umbrellabox vs. Shoot-thru

I routinely use a shoot-thru umbrella for portrait work, given I work on location for much of the portrait work I do. When I occasionally do something with a bit more time and looking for better quality of light, I like to use the Lastolite Umbrella Box. However, it's interesting to know how much of a difference the more expensive and slower to setup umbrella box actually makes.

First of all, a look at the two in action side by side. The Lastolite Umbrella Box is a touch larger than the Portaflash White Diffuser Brolly, but in practice it makes little difference a lot of the time because you can get it in closer to the subject.


Comparing the two, you can see that at the same power, the Lastolite Umbrella Box loses a lot of light compared to the shoot-thru umbrella. The umbrella box actually has a white interior rather than silver, so that's one of the big losses on top of the diffusion material. That said, it does give a great quality of light.

Lastolite Umbrella Box:


Portaflash White Diffuser Brolly:


Now for a little comparison for portrait work. I grabbed a rather good looking subject for this exercise. Firstly, the umbrella box. You'll notice that the control of the light on the background is pretty good. You've got the background going to black on the left, showing how much control you have with it. It is also not too harsh on the edge of light, so if you do want to light the background the way I have, you'll have a nice fall-off on the background.


You can see how I positioned the umbrella boxfor this shot.


Now for the Portaflash White Diffuser Brolly. As expected, there's a lot more light spill in all directions. If you look carefully at the left hand side, you'll now see a light switch on the rear wall which is showing up, but which was hidden in the previous image.


Here's a shot of the overall scene. Note the flare from the umbrella in this wide angle shot. That's a lot of spill, so it's something to note...the umbrella isn't actually stopping the direct source of light causing flare. Just something to be aware of!


So what's the diffence? Well, the first is that the umbrella boxuses up a lot of light, so if you're using small flashes, this can become an issue. Of course, with studio flashes, that's not so much of an issue given the extra power.

What's the benefit? Well, the quality of light is marginally better, but given you can get the shoot-thru brolly in nice and close, while still being out of the shot, you can still get pretty good soft light. There are also no sharp highlights with the Lastolite Umbrella Box, so if your subject has reflective surfaces, you'll find it better.

Another major benefit, as I showed here, is how much better control you have over the direction of the light. This means you can direct the umbrella boxsuch that the background is left dark, meaning you can control it better even in small spaces. This also has the benefit of meaning flare isn't nearly as much of an issue as it is with the shoot-thru brolly.

What about the shoot-thru brolly? Well it's cheap and fast to setup anywhere. It gives good quality light for the price (almost as good as the Lastolite Umbrella Box), and will easily become your mainstay for portrait work in most situations. Also, because it's just diffusing the light, rather than an additional bounce, it doesn't lose nearly as much light. The shoot-thru nature also makes it possible to control the size of the source by zooming in the flashgun, or moving it closer such that you choke the light. You can see an example of this in the previous entry.

Advertisement